Showing posts with label beauty. Show all posts

Thursday, 29 December 2016

Hooked on SensatioNail

It's happened.  It was just a matter of time but it's happened.  I finally gave in and now own a gel nails kit courtesy of SensatioNail, a generous brother and a Black Friday dream of a deal from Boots.  As a result, I am now hooked on SensatioNail.  Completely and utterly hooked. 

As a nail-obsessive, I'd been debating for a while whether to go down the road of owning my very own gel nail kit or to carry on persevering with my standard, run-of-the-mill-can't-make-it-24-hours-without-chipping nail polish but most times decided against buying gel kits due to the costs involved.  This year though I did the maths (and finally understood why I worked so hard to get that GCSE A-grade in Maths.  Maths is important so you can calculate the value of owning your own gel nails kit vs. trips to the nail bar.  Thank you school education, you have treated me well.).  The maths told me that buying a gel nails kit was actually a sound investment due to not having to paint my nails as often because of the long-lasting nature of a gel manicure as well as not having to pay £20-£40 at a nail bar having someone else do my gel nails for me.  After this quick mathematical equation which looked a bit like the below, I came to the conclusion that a gel nails kit was most definitely needed:

If x + y = z then that means I MUST BUY A GEL NAIL KIT (ok, so it wasn't my adeptness at equations that earned me that A-grade in maths!)

After the maths came the research which all led me to a well-known (particularly amongst beauty-lovers) company called SensatioNail.  It seemed that SensatioNail was the way to go - good reviews, it was sold in Boots as well as online and there was a great range of nail polish colours and products. 

Then came Black Friday and the offer of the SensatioNail Limited Edition Ultimate Gel Starter Kit for £35 on Boots online which had been reduced from £80.  This resulted in some minor heart palpitations, although I had just had an espresso so I think that the caffeine should take some credit for that, however once the palpitations had ceased, I immediately whasapped my brother and asked for (or demanded, I can't quite remember?) the kit for my birthday.  It was one of those moments where when you know you know, you know?  I just had to have the kit and thankfully my brother kindly (and quite possibly because he feared the repercussions if he didn't yield) got me it and gave it to me upon the day of my birth. 

The gel nail kit of dreams!

The kit came with SO much including (as listed on the Boots website):

  • SensatioNail Pro 1530 LED lamp with mains adaptor
  • 2 colour polishes: Miss Behave & Going for the Rose Gold (3.69ml each)
  • Gel base/top coat (7.39ml), Gel Cleanser (27.2ml)
  • Gel Primer (3.54 ml), Polish to Gel (7.39ml)
  • mixing pot
  • removal tool
  • nail shields
  • manicure stick
  • buffer
  • lint free wipes.

  • Like I said, SO much! 

    The next thing I did was watch some YouTube gel nail tutorials and decided that I wanted to try out the chrome nail trend that everyone is falling head over heels for.   I bought some chrome powders from eBay, a no-wipe gel top coat from Amazon (only no-wipe gel top coats work otherwise the powder wipes off or loses the chrome effect) and a SensationNail gel polish in the shade Midnight Rendezvous (which is a black shade) as I needed a dark colour to achieve the mirror-like finish from the chrome powders.  The whole kit worked like a dream, it was easy and simple to use and the manicure stayed chip-free for the 2 weeks I had it on.  Check it out below: 

    Gel Chrome Nails
    I also found that SensatioNail themselves had some great videos on their website offering guidance and tips on how to use the SensatioNail products which I would thoroughly recommend checking out.

    I have since used my nail foils too which had been lying around in my nail art drawer for what had seemed like a lifetime and created an eye-catching gel nail design with them (click here to check out the tutorial video that I used for achieving a foil nail design for gel nails).

    Gel Foil Nails
    This gel nails starter kit is great for anyone who loves having stunning-looking and long-lasting painted nails and it has the added bonus of working out cheaper than regularly visiting a nail bar to get them done - plus, even if you were to pay the full £80, it still works out cheaper in the long-term (don't argue with me because, I don't know if I've mentioned this before, but one time I got an A-grade in maths.).  That being said, Boots currently have this kit back on offer at a reduced price of £40 so I would thoroughly recommend snapping this up before it sells out! 

    Have you used any SenatioNail products before?  Drop me a comment to let me know you're thoughts!   I'm already brainstorming NYE gel nail ideas as we speak so if you have any tips or useful gel nails advice then that would be greatly appreciated!


    Tuesday, 26 April 2016

    The Pavan Henna Bar

    So back around Christmas time, I was invited to the Pavan Henna Bar at Selfridges to have some henna done and check out some of their products.  Now, due to some unforeseen laptop issues (i.e. my laptop broke) I am now only just able to blog about it now with my fully (finally) working laptop.

    I have had henna done at the Pavan Henna Bar at Selfridges before which was when I got henna done on both hands for my birthday (see pics below). 


    Therefore, when I was invited to check out the Pavan Henna Bar back in December, I couldn't resist and made the trek, well one 20-minute bus journey ride after work, to Selfridges in Oxford Street. 

    Once at Selfridges, it was somewhat of an intense navigation process to find the Pavan Henna Bar due to the hordes of overly excited Christmas tourists, I lost count of the number of MASSIVE Selfridges tote bags that people knocked into my poor little legs. 

    Once I located the henna spot in the beauty hall, I met Pavan who did my henna for me and who also happens to be the lady behind the Pavan Henna Bar (I suppose the clue is in the title there) AND who also happens to be the official record holder of the World's Fastest Henna Artist' which is pretty impressive. 

    Whilst having my henna done, Pavan told me about breaking the world record and being the Word's Fastest Henna Artist as well as having set ups in other locations including Manchester and even as far afield as Abu Dhabi.  Pavan also told me that they could do white henna as well as henna in glittery hues which looked so pretty.

    I stuck to the traditional henna colour and decided to get the henna design done on my wrist/back of my lower arm mostly so I could keep it covered at work rather than for aesthetic reasons.  The design Pavan created looked gorgeous and I absolutely loved it plus she did it so speedily which was an added bonus.
    Whilst waiting for the henna to dry, I was speaking to a couple of lovely ladies who also worked at the henna bar who were so kind and friendly and were telling me all about how they had done henna for Ellie Goulding as well as Perrie from Little Mix so I immediately felt a little bit cooler!

    Now that we're coming up to summer (It's about bloomin' time!) I can't think of a better time to be heading back to the bar and I will soon be making my appointment to get had better book my appointments now before Perrie or Ellie beat me to it because that would not be ok!

    Oh, I almost forgot to mention, Pavan also let me choose some henna-style temporary finger tattoos to take home with me and try out which are great.  I opted for silver ones and they are ideal for a special occasion or if you're going to a gig or festival plus they're so quick and easy to use which is always a good thing if you ask me!
     
    Have you had henna done at the Pavan Henna Bar before?  Let me know what you think and drop a comment below!  

    Wednesday, 19 August 2015

    White Henna Exists. For Real.

    Can we all just take a moment and acknowledge the fact that white henna exists. 

    Now that we've all taken a moment, I shall continue.......no wait, I'm going to need a little longer to fully take in this new nugget of information. 

    First came the tan/brown henna then the evil/dangerous black henna and now the beautiful white henna.  Now, if you're thinking, 'white henna? Really?' with an edge of scepticism then feast your eyes on this stunning white henna (and nail art may I add!) courtesy of Reecey Roo's Instagram feed:


    God Bless Reecey Roo's Nail Art Bar for this stunning white henna!
    (Image via Reecey Roo's Instagram page)

    Looks stunning, doesn't it?  Plus how perfect would this be for a wedding?  As someone who's fairly obsessed with henna (obsessed in a completely healthy way - see below pics for my henna love affair), white henna just seems to be the next step for me and I can't wait to try it out! 

    This is a temporary henna tattoo transfer that I applied myself. 

    I love my tiny henna temporary tattoo transfer which you can see on my
    middle finger here.  Also, feel free to appreciate the nail art that I did which
    featured real dried flowers!

    Please ignore my slightly mannish hand and appreciate the  intricate henna design
    here that I got from Pavan's henna bar in Selfridges last December.

    Let me know what you think of white henna?  Have you tried it before?  Plus if anyone knows of anywhere that does great henna for a reasonable price (I've only ever had it done at Selfridges where it's quite pricey or used temporary tattoos) then please let me know?

    Thanks!

    Sunday, 29 March 2015

    Making Glitter Nail Polish on a Sunday Night

    Sunday night blues are the worst, you know it, I know it and I'm pretty sure that that person sitting next you to on the train on your early Monday morning commute knows it.  So, seeing as I was suffering from those dreaded Sunday night blues earlier this evening (mostly due to the fact that I have to be up at 4:50am tomorrow morning for work), I decided to have some nail polish-related fun and create my own glitter nail polish. 


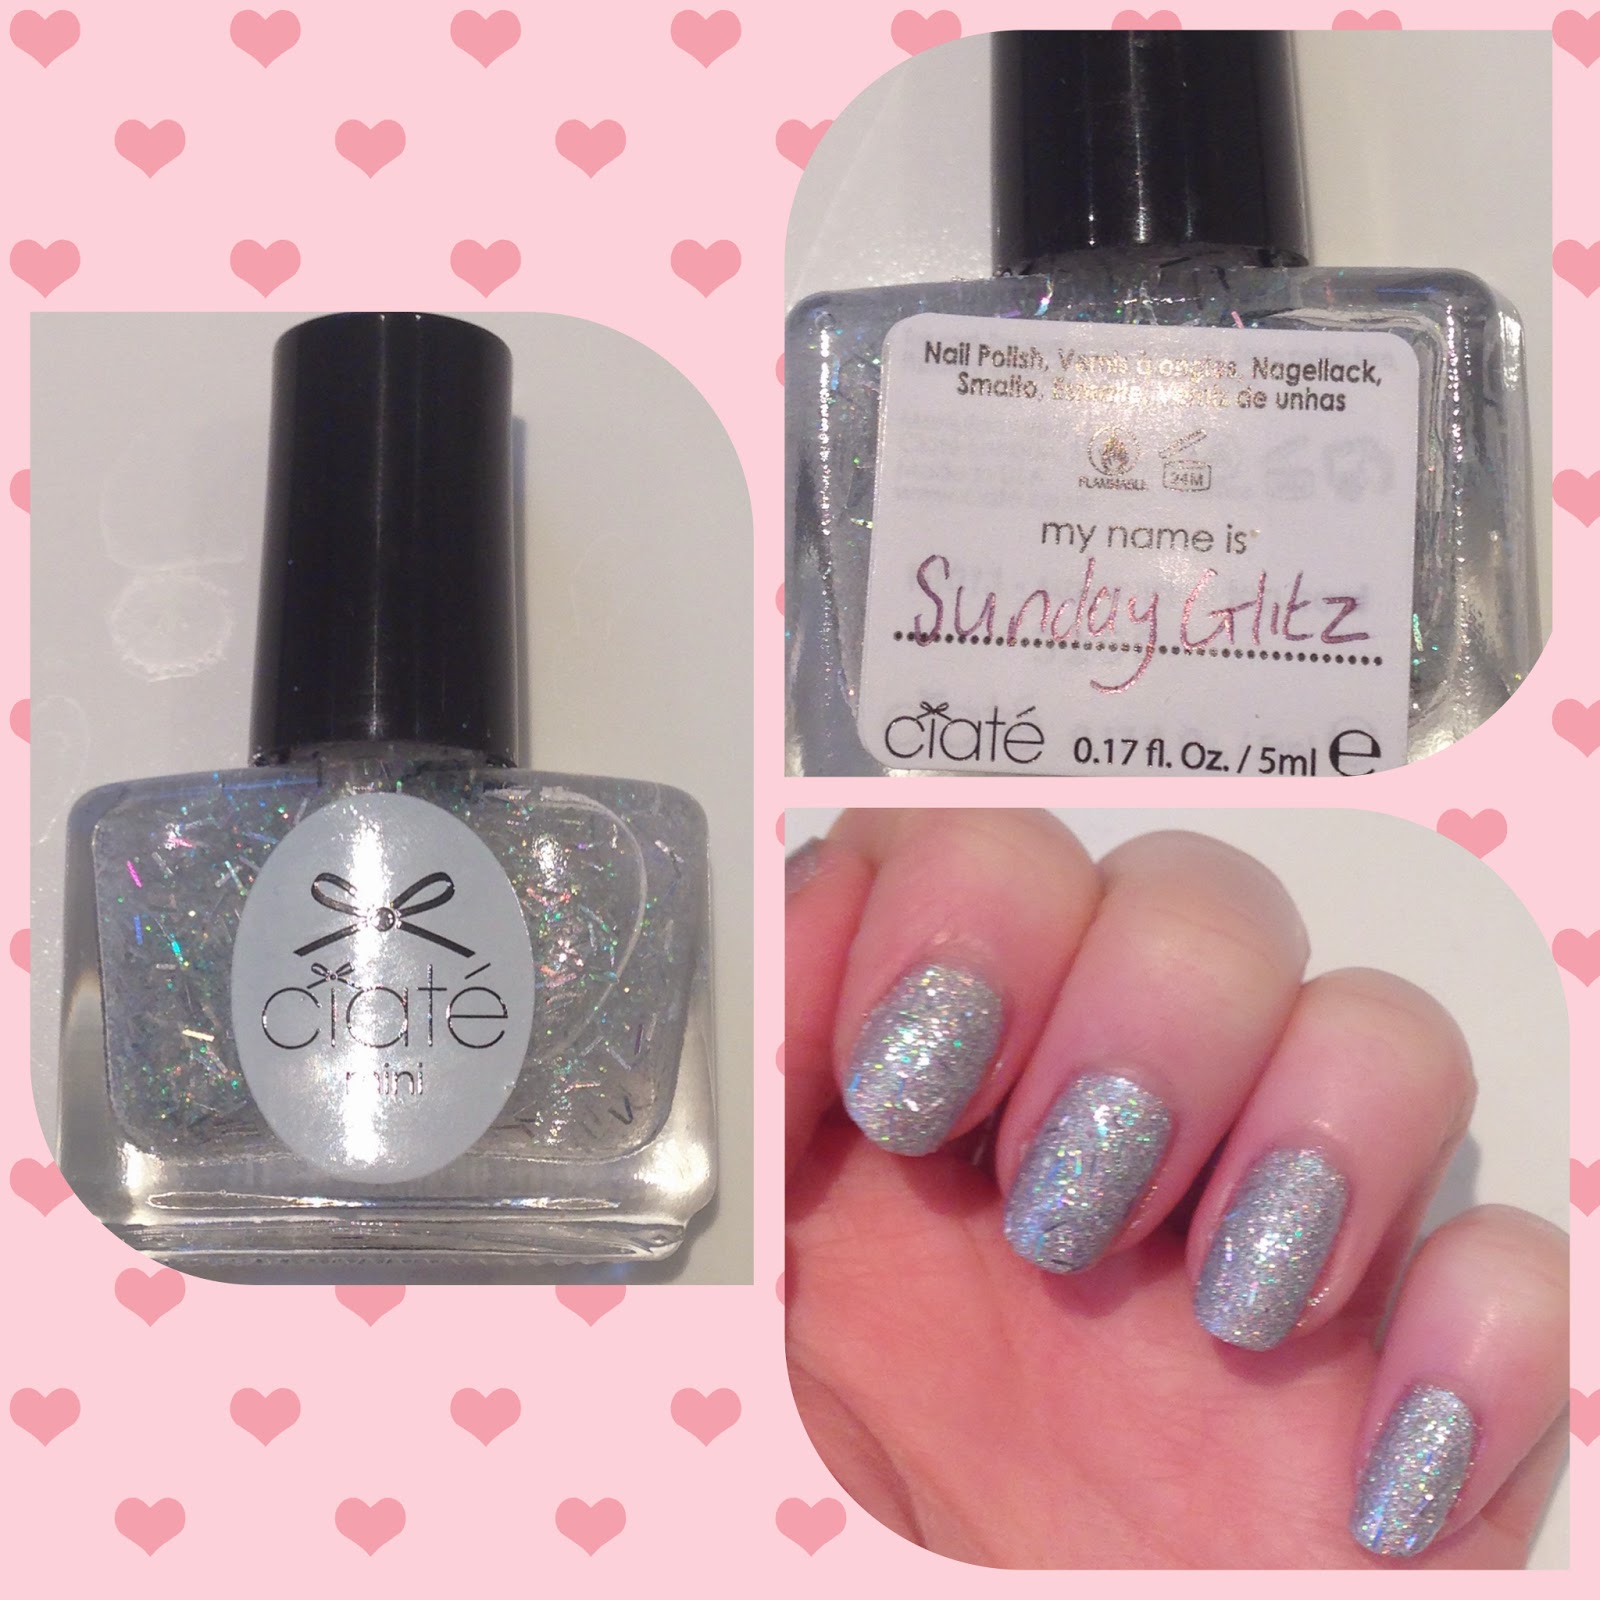
    Back in the January sales, I purchased Ciaté's Nail Lab which was reduced from £80 to £25.  BARGAIN.  This nifty nail kit supplied me with paint pots, top coats, test tubes, a funnel, a scooper, 6 mini nail polishes, recipe cards, labels and LOTS of glitter. 


    Ciaté's Nail Lab in all its glory!

    Making up the nail polish was so easy and fun, I cranked up the music and felt like a mad scientist (of the nail polish-creating variety.  It's actually a very common type of mad scientist.) as I commenced upon my glitter nail varnish-making journey.  I decided that I wanted a super sparkly silver glitter with holographic confetti strands so I selected my glitters and added them to my test tube using the funnel and then gave it a good shake to mix up all the different glitters.  Once I was happy with my glitter mixture, I simply poured it via the funnel into one of the top coat nail varnishes, shook it up and it was good to go. 


    If chemistry had been a bit more like this at school
    then maybe I would have enjoyed it more!

    I won't lie to you, by the time I was finished, it did look like there had been a fairy house party that had got out of control in my kitchen thanks to the amount of glitter that had spread all over the table and on the floor.  It's easy to clear up though with a wipe down of the table and a quick sweep of the floor so it's hardly a big deal. 


    'Sunday Glitz'
    One homemade glitter nail polish ready to go!

     What I love about this kit is that it includes labels for you to name and label up the nail polishes that you have created, I named mine 'Sunday Glitz' because, well, it was glitzy and it was Sunday.  I'm pretty deep.  I also used Ciaté's Paint Pot in the shade 'Looking Glass 131' as my base colour under my glitter to make my nails look even more sparkly and eye-catching.


    Ciaté's Paint Pot in 'Looking Glass 131'

    I have to say as great as Ciaté's Nail Lab is, I'm not sure that I would have paid top dollar for it as £80 seems quite excessive and I definitely would not have been impressed to have seen it go into the sale if I had paid so much for it in the first place.  However, £25 is a steal for such a great concept and piece of kit - not only did I feel mighty creative when making up my nail polishes but I also completely forgot that it was the end of the weekend because I was so caught up in my mad scientist ways (I genuinely should have been wearing a white lab coated, goggles and maniacally giggling away).

    My finished nails with Ciaté's Paint Pot in 'Looking Glass 131' as it's base colour
    paired with my homemade glitter nail polish top coat in 'Sunday Glitz'

    I also purchased Ciaté's Flower Manicure kit in the same sale which I'm going to try out next weekend for Easter so I'll be sure to let you all know how I get on with that but I have a feeling that I'm going to love it just as much as their Nail Lab so you've been warned!


    So proud of these beauts!

    Sunday, 2 November 2014

    Happy Halloween!

    *HAPPY HALLOWEEN!*
     
    It's been a little while since I last blogged as I've been super busy with a bunch of stuff so apologies for my lack of presence on here.  Part of the reason as to why I've been so busy is that I've started having to commute to London which often means that I have to leave the house before 7am and I don't get home until half seven in the evening so, as you can imagine, it's pretty exhausting.  Worth it, but exhausting!
     
    Anyway, seeing as Halloween has been all around us lately it seemed only right for me to commence my blogging duties by embracing all that is All Hallows' Eve!
     
    I'm not great with Halloween as I'm easily scared - it took me years before I could watch Hocus Pocus without being terrified of Billy (the zombie) - I'm pleased to say that at 24 years old, I can now watch it without the fear factor, and, if anything, Billy (besides Binx the cat) is probably my favourite character in the film. 
     
    My Halloween was fairly laid back this year and I basically refused to watch any full-on scary movies as I'm the kind of person where even the front cover on scary movie DVDs tend to freak me out so just watching them is pretty much out of the question!  However, I did agree to watch Tucker and Dale vs. Evil with my family which was bloody (literally) brilliant!  If you haven't seen it (and you really should) it's about two hillbillies who a group of college kids assume to be crazy serial killers, it's what I call a proper 'laugh-out-loud' movie and stars Tyler Labine, who I've been a huge fan of ever since watching Reaper (why did they have to cancel that show?  WHY?!).  It also stars Alan Tudyk who happens to be in one my of favourite (and recently-cancelled!) TV shows, Suburgatory, as well as being the voice of the Duke of Weselton in Frozen (bit of trivia for ya there!).  You should definitely check this film out if you want some giggles - be warned though, there is a bit of gore but if I can handle it, then you probably can too!
     
    I was keen to make sure that my nails matched the Halloween atmosphere this year and went for some fun monster nail art which took me about an hour to do but was well worth it and resulted in plenty of compliments at work.   
     
     
    I was also determined to make the most of the Halloween festivities on Friday so rocked this pumpkin crop top to the office:
     
     
    I got the pumpkin tee for £5 reduced from £28 last summer from Urban Outfitters and I was so excited to finally get to wear it so thank goodness I didn't forget about it or I probably would have cried.
     
    I was meant to go to a Halloween house party on Friday night but got back from work late which made it impossible to go to the party - plus I was incredibly tired from work so it was probably for the best (or at least that's what I told myself!).
     
    Even on Saturday night when more Halloween revellers were out causing mischief and mayhem, I settled for a quiet dinner out with one of my best friends which, in my opinion, was much better than a night out as we were able to have a proper catch up which was lovely as we hadn't seen each other in about two months! 
     
    I finished off my Saturday night with a heavenly Halloween-themed bath courtesy of Lush.  I used their Halloween Wizard Bubble Bar which smelt divine and turned my bath a stunning shade of purple and it was exactly what I needed after a long week of work! 


    So Halloween this year was a somewhat relaxed affair compared to previous years but I'm kind of OK with that, as in all honestly, I just don't think I had the energy to go full throttle this year - I guess that's a sign of getting older, right?  YIKES!


    Tuesday, 14 October 2014

    Spider Lashes & Red Lips

    I've never been one for a red lip, in fact, I'm far from a lipstick aficionado and normally the most you'll ever see me do when it comes to my lips is whack on some Chapstick or a sheer lip gloss.  'Why?' you may ask, well mostly because lipstick never stays on, you constantly have to reapply it and I'm always paranoid that it has somehow transferred onto my teeth - so as you can see, it's somewhat of a fraught relationship. 

    However, I decided to be less Scrooge-esque in my attitude towards lipsticks (I'm still going to keep saying 'Bah, Humbug' though because it's not said enough these days if ya ask me!) and try out a red lipstick-style look:

    I give great 'serious face'.
     
    As you can see, I decided to keep the rest of my makeup pretty minimal and focus mostly on my lashes and my lips. 

    
    *Act natural*

    My favourite part of the look (besides my letterbox-red pout) was my spider-inspired lashes.  Normally, just the word 'spider' can offend me and make me start feeling paranoid that I have an eight-legged fiend crawling up my arm but when it comes to my lashes then I can just about put this slight qualm to one side.  I'm mature like that, you see.

    I did a bit of research on spider lashes (or 'tarantula lashes' as they are also know - less comfortable with that alternative name.  'Spider' I can deal with, 'tarantula' I cannot.) and found that this mascara style features in the 'it' hair stylist and makeup artist of the moment, Lou Teasdale's, hair and beauty guide called 'The Craft' (which I am yet to buy but desperately need to)!  I love the grungy and dramatic glamour of this lash look and the simplicity of its creation - all you need are some tweezers (to clump your lashes together) and boatloads of mascara.  Simple enough! 

    
    LEFT: one coat of Benefit's BADgal Lash Mascara on the upper lashes.
    RIGHT: spider lashes using Benefit's BADgal Lash Mascara on upper and lower lashes. 

     I also used this fab YouTube tutorial to help create my spider lashes, check it out:


    If you watched the above tutorial then you'll see that she used an eyeliner as well for the look which was the only thing that I didn't do as I felt that I didn't need it.   

    
    From let to right:  Benefit High Beam (RRP £19.50), Cargo Cosmetics Water Resistant Blush in Ibiza (RRP £19), Benefit BADgal Lash Mascara in Black (RRP £17.50), No7 Perfect Light Loose Powder in Translucent (RRP £10.50), Rimmel Lasting Finish Lipstick in 220 Retro, GOSH Velvet Touch Foundation Primer (RRP £7.99), Benefit Browzings Brow Shaping Kit in Light (RRP £24.50), MAC Studio Fix Fluid Foundation in NW10 (RRP £21.50) and Revlon Colorstay Foundation for combination/oily skin in 110 Ivory (RRP £12.49).        

    The rest of my makeup is pretty simple - I used my GOSH Velvet Touch Foundation Primer and mixed a splodge of my Benefit High Beam product with it and applied this all over my face and left it for about 5 minutes just to sink into my skin.  I then applied a small amount of Revlon's Colorstay Foundation for combination/oily skin in 110 Ivory to my foundation brush and applied it to my T-zone area and buffed it out so that it really was a very light and subtle application.  Afterwards, I grabbed my MAC Studio Fluid Fix Foundation in NW10 which I use as a concealer and applied it to a couple of blemishes that I have (YAY! Aren't blemishes just the BEST?!......Or not.) and finished it off with a dusting of No7's Perfect Light Loose Powder in Translucent.  Moving onto my brows, I normally use a bit of powder, wax and eyebrow gel on them to create a precise brow but this time I wanted a soft and natural look so I just lightly filled them in with the powder from my Benefit Browzings Brow Shaping Kit in Light using a soft eye shadow brush to achieve this.  I then curled my lashes and created my spider effect using Benefit's BADgal Lash Mascara in Black, I added a subtle pop of colour to my cheeks using Cargo Cosmetics' Water Resistant Blush in Ibiza and finished off with my Rimmel Lasting Finish Lipstick in 220 Retro. 

    If make up products could be best friends then I'm pretty sure that these
    guys would be the ULTIMATE best friends.  Whatever that means.
     
    I won't lie to you, I am still wary of vibrant coloured lipsticks as I'm lazy and can't be bothered to keep reapplying my lipstick on a night out because I'd rather be shaking my booty up on the dance floor (and embarrassing myself horrendously by thinking that I can twerk like a pro when in reality I can't twerk to save my life.) but once in a while I do think that a beautifully bright lipstick is worthy of my attention because sometimes it's just nice to have a change.  The spider lashes on the other hand will definitely be making an appearance on a fair few nights out, not only do they give you lashes with drama without having to reach for the falsies but they're also so easy and quick to do - plus you can go as over-the-top as you like with them making them perfect for your Halloween makeup this month!

    Let me know what you think and drop me a comment belooooow!


    Thursday, 4 September 2014

    WAH Nails: Marble Nail Art

    For those of you out there who aren't already aware, I'm somewhat of a WAH Nails enthusiast and when I'm not constantly scrolling through their Instagram pics then I'm eagerly checking out their Twitter feed awaiting some new nail art revelation. 

    I recently stumbled upon WAH Nails' YouTube page and their nail art tutorials and the only way I could have been more excited was if I was actually at WAH Nails getting my nails done!  I couldn't help but want to try out one of the designs so I went with the most recent video upload which was their 'Candy Marble Nails' tutorial.  I decided after watching the video that I would adapt the design somewhat and so I went for a different selection of nail polish colours as I wanted a really vibrant finish.  I also did more of a mismatched swirl in my marble design compared to the one done in the tutorial but the technique was completely the same.  I love this design as the effect comes out different on each nail and you can swirl the nail polish anyway you choose which injects a bit of personality into the overall look.


    The beauty of this nail art design is that you don't even need any nail art tools - just a couple of nail polishes (I used 4 different colours), a base coat, top coat and some cocktail sticks.  It's a super simple concept that creates such a strikingly stunning nail art look. 

    Products used from L to R: Seche Vite Dry Fast Top Coat, OPI Nail Envy Nail Strengthener, Barry M Gelly Hi-Shine Nail Paint in the shade Blue Grape, bright pink Kelly Brook Nail Polish (available from New Look), Barry M Nail Paint in the shade Foil Effect (gold), Barry M Nail Paint in the shade Matt White and cocktail sticks.  

    All I did to create this look was start off with my OPI Nail Strengthener base coat and I then applied one coat of Barry M's Gelly Hi-Shine Nail Paint in the shade Blue Grape.  Afterwards, doing each nail one at a time starting with my thumb nail, I applied some blobs of my Barry M nail polish (the same one I mentioned in the previous sentence) onto my nail followed by blobs of Kelly Brook's nail polish in a bright pink shade and then some blobs of Barry M's Nail Paint in the shade Foil Effect (Gold) and finally some blobs of Barry M's Nail Paint in the shade Matt White.  Once I was all blobbed out, I grabbed a cocktail stick and swirled it through the wet nail polish which created a marvellously dreamy marble effect.  After I had done this blobby/cocktail stick routine on each nail, I finished off the design with a slick of Seche Vite's Dry Fast Top Coat and I was good to go!


    This nail art look essentially gives you a very similar finish to water marble nail art but without the clean up or sellotape prep that you would have with the water marbling process for your nails.  Don't get me wrong, I love doing water marbling on my nails but it can be quite fiddly and sometimes a little messy around the nail.

    It took me about 25 minutes to achieve this WAH Nails marble design which just makes it even more amazing if you ask me - it's quick, it's simple, it's easy, you don't need any fancy tools and it looks so incredibly striking that you'll be getting compliments all day!

    Here's the WAH Nails YouTube tutorial which I was referring to in this post, check it out:


    Let me know what you think about this nail art design, I'd love to hear from you!

    Wednesday, 3 September 2014

    Skincare: Getting Back to Normal

    Ok, so I've been pretty ill over the last few days which has prevented me from any blogging or computer-related activities so I've mostly been confined to my bed whimpering 'Oh, woe is me!' over and over again (because when people are ill, they should most definitely quote a line from Hamlet.  Don't blame me, blame Shakespeare.).  Without going into too much detail, my illness/virus/bug/whatever-you-want-to-call-it was very much reminiscent of a certain scene from The Exorcist.....I think you know where I'm going with this.......let's just say there was some nausea involved and leave it at that so I that can stick to this ladylike façade of mine.

    Now that I'm feeling a little better and can actually keep food down (woohoo! COME AT ME DRY CRACKERS!) I'm just about to begin the process of getting my skin back to normal.  I'm still in the early stages of rehydrating myself and drinking bucketloads of water just to stop my incessant dreams about juicy grapes, peaches and strawberries - for some reason, that's all I dream about when I'm ill and dehydrated.  Great, now I can't stop thinking about juicy fruit.  This dehydration has affected my skin and left it in a pretty unhappy state and it hasn't helped that by being ill, my daily skincare routine has fallen by the wayside.


    So I'm now ready to tackle my poorly skin and get it back to it's normal, healthy state.  This doesn't mean going full force, I always think it's best to just go back to using my standard products as anything too strong or too heavy could upset it (oh, the joys of having sensitive skin!) plus I kind of think it's best to gently coax you skin back to normal rather than aggressively ambushing it unnecessarily! 


    I've always believed that you don't need to spend loads of money on skin products, it's just a case of knowing what ingredients you're after and what works for your skin.  I'm someone that suffers from oily/combination skin with the occasional hint of dryness throw in (wahey!) so my morning routine always includes Neutrogena's Visibly Clear Oil-Free Facial Wash (£4.49 for 200ml).  This is a great cleanser for oily skin as it contains salicylic acid which is an amazing exfoliating agent for oily/greasy skin and it was actually recommended to me by a dermatologist and you really can't argue with a skin expert!


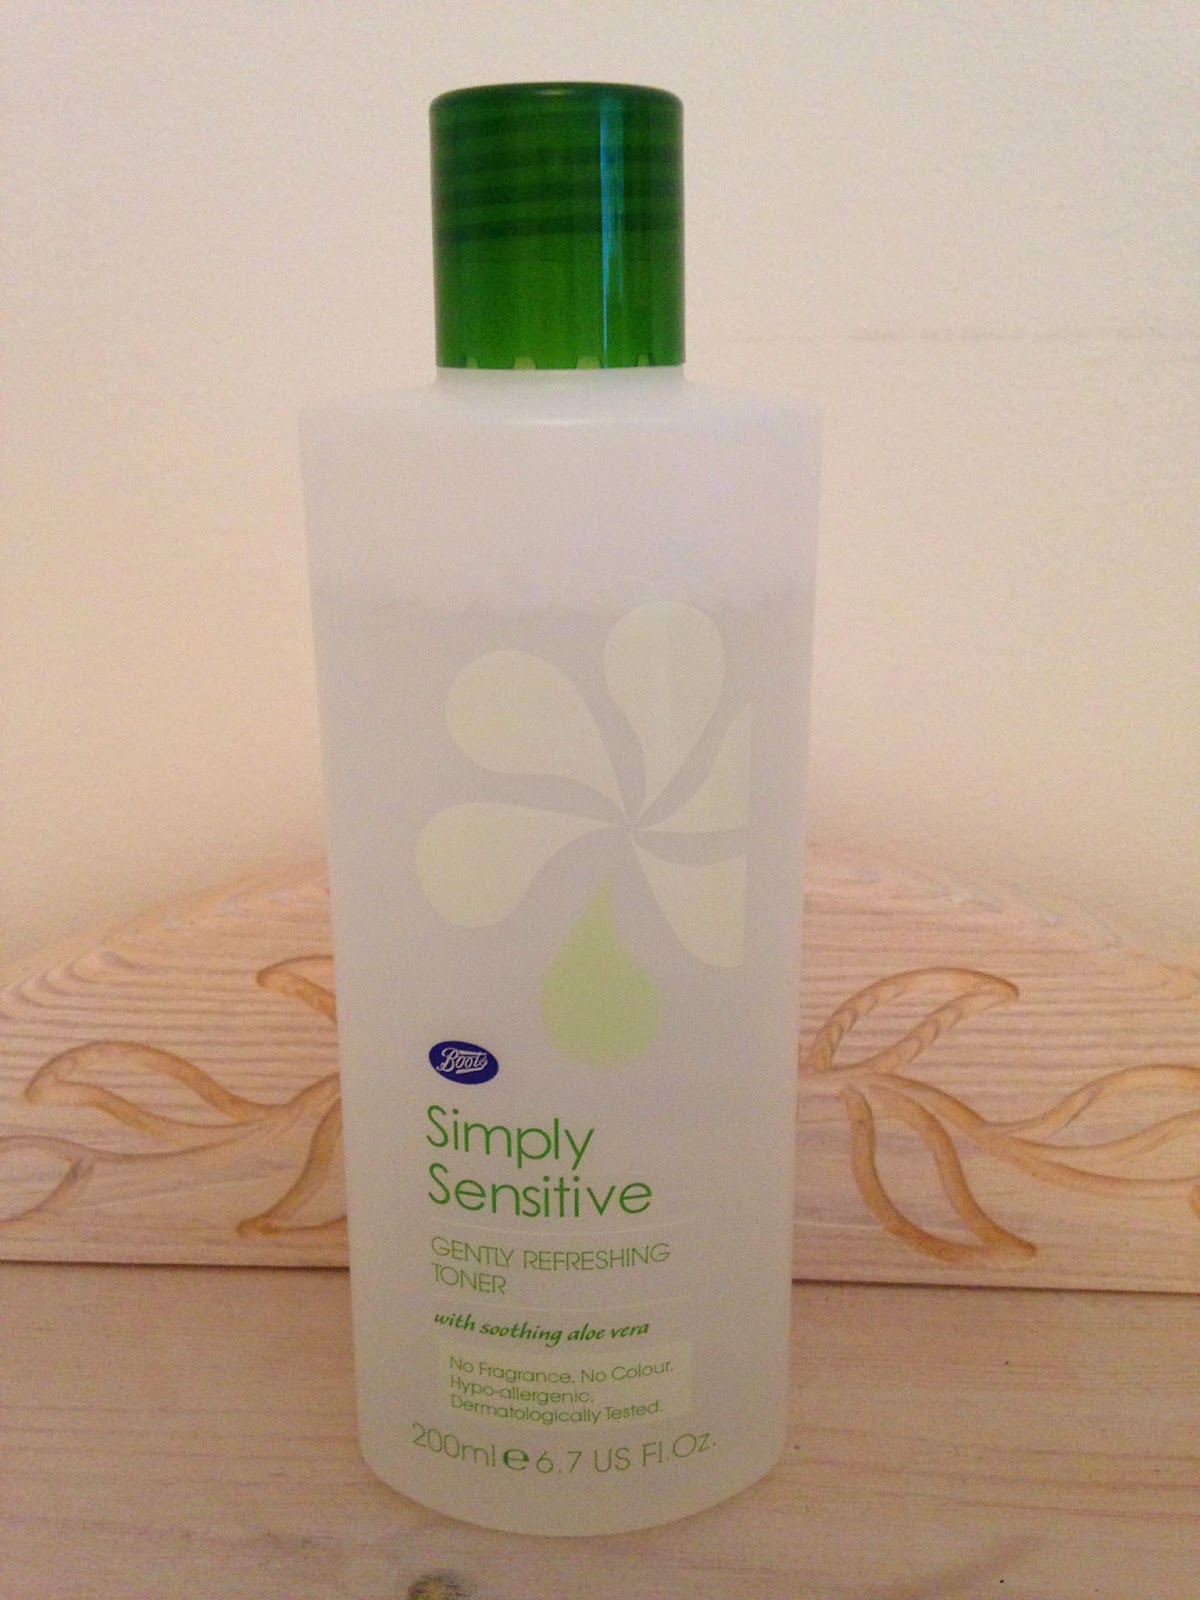
    When it comes to toner, I've always used Simple Kind To Skin Soothing Facial Toner (£3.29 for 200ml) however recently I decided to branch out when I saw that Boots had a half price offer on their Simply Sensitive range which resulted in me spending a not-so-whopping £1.34 (normally £2.69) on a bottle of their Gently Refreshing Toner (200ml).  I have to say that there is little difference between this toner and the Simple toner, it removes any leftover makeup and your skin feels incredibly clean afterwards.  Also, even at its full price of £2.69, the Boots Simply Sensitive toner is still cheaper than the Simple toner which makes it even more attractive!


    Now to the moisturising and the most expensive product in my skincare routine - Olay Essentials Complete Care Day Fluid for normal/oily skin.  I love love LOVE this moisturiser, it's light enough for oily skin but still leaves your skin feeling hydrated and soft which is exactly what I'm after from a moisturiser.  It's a little pricey at £9.99 for a 200ml bottle but they also offer a 100ml for £5.99 - plus you'll often find that there is half price offers on this range in Superdrug or Boots so I normally purchase the 200ml bottle when it's half price and by the time I run out (it lasts a long time!) then there's normally another offer on.  They also offer a sensitive version of this product which is mighty handy!


    Focussing on the moisturising situation, now would be the time that I would crack out my Chapstick......but I lost it and I have NO idea where it is so instead as my backup I've got Palmer's Lip Balm Cocoa Butter Formula with Vitamin E (£1.89 for 4g) which I love, just not as much as Chapstick but it's a solid second best.

    I pretty much use the above products that I've just spoken about every morning in that order and stick with it for my night time routine as well, with only a few added extras which are mentioned below!


    Before I go to bed and after I've moisturised my face and my lips, I like to use a little bit of Quinoderm 10 (£2.65 for 25g), which is an acne cream.  Now, I don't have acne but like most people, I get the occasional blemish so what I like to do is pop a little bit of the cream onto a cotton bud and apply it to the blemish and rub it in.  This product was recommended to me by the same dermatologist mentioned earlier in this post as the cream is strong enough to dry out spots (or pimples if you're American!) but it's not overly strong that it's going to leave dry patches on your skin.  I normally have to get this from the actual pharmacy section in Boots or Sainsbury's but you don't need a prescription for it so it's pretty easy to get hold of.  Also, this cream is available in varying strengths, I believe that you can also get Quinoderm 5 which is a weaker composition of the cream but I don't I find this as effective at blemish removal for my skin as Quinoderm 10.


    Finally, if I have any sneaky little dry patches on my skin then I like to use Vaseline Original Pure Petroleum Jelly (£2.15 for 100g) on these patches.  I find that this classic product works much better when used on actual dry skin as opposed to on my lips as it ALWAYS dries my lips out and from speaking to other people, I know that I am not the only one that this happens to.  Weird, huh?

    Right, so that's my standard day and night skin care routine and it's also what I'm going to be throwing at my skin in order to get it back to its former glory, wish me luck and also let me know of any other products that you can recommend to help my skin recovery or if you're a fan of any of the products mentioned in this post!

    Thursday, 21 August 2014

    Nail Update: Summer, glitter and sparkles!

    So last week I was working the black gloopy nail art look which I absolutely loved, in fact I loved the gloopy factor so much so that this week I decided to update this nail art design and give it a more summery twist by swapping black for pink, glitter and sparkles!

    Check it out my lovelies:

    I can't help but smile when I look at these - is that a bit weird?
     
    
    This design is not only cute but also pretty damn easy to do so it ticks all those pesky nail art boxes!

    If you're interested (and I'm naively assuming you are seeing as you've read this far!), here's everything that I used for this look (minus the nail glue which I threw away because I used it all up):

    (Top to bottom, left to right: nail diamante pin wheel (purchased from New Look but there are loads of these available on eBay), cosmetic sponge. Nail polishes (left to right): OPI Original Nail Envy Nail Strengthener, Seche Vite Dry Fast Top Coat, Maybelline Color Show Nail Polish (shade - Sugar Crystals), Models Own Nail Polish (shade - Snowflakes NP145), Bourjois So Laque! Ultra Shine Nail Polish (shade - Rosé Merveille 45), Barry M Nail Paint (shade - Matt White 66). Nail art brushes both purchased via eBay).

    
    To create this look start off with a base coat, I used OPI's Original Nail Envy Nail Strengthener  which is my standard base coat because it keeps my nails nice and strong.  Then for all the nails except your ring fingers, apply one coat of Maybelline's Color Show Nail Polish in the shade Sugar Crystals followed by two coats of Model's Own Nail Polish in the shade Snowflakes NP145.  While your nails are drying move onto your ring fingers and apply two coats of the Bourjois So Laque! Ultra Shine Nail Polish in the shade Rosé Merveille 45 and leave to dry whilst going back to the rest of your nails you painted earlier.

    Using a thin nail art brush, apply the same Bourjois nail polish used on your ring fingers along the tips of your nails creating French tips.  Once done, use an even thinner nail art brush (you'll want this for the precision of your 'gloops') and paint in your 'gloops' and connect them to the French tips you just painted on. 

    Going back to your ring fingers, make sure that they are completely dry and if so, grab a cosmetic sponge and dab a little bit of Barry M's Nail Polish in the shade Matt White 66 onto the sponge and then blot it onto some kitchen roll, tissue or tin foil and carefully dab it onto the tips of your nails working down to create a subtle ombre/dip dye effect.  Once your happy with your ombre effect, then apply Seche Vite's Dry Fast Top Coat to blend the white and pink nail polish together even more so.  Then apply the same top coat to the rest of your nails.

    To finish off, grab a selection of diamantes for your two ring fingers and using some nail glue apply the diamantes to your ring finger nails.  Finish off with a final application of your top coat and you're all done! 

    I hope my explanation made sense, I'm one of those people that has a tendency to waffle on a bit so it can be a real mission for me to explain something relatively simple without making it sound incredibly complicated and daunting.

    Well, there you have it, a simple guide to some super summery and sparkly nail art - let me know what you think!

    I could stare at these all day!

    Monday, 11 August 2014

    Eye-Catching Nail Art

    It's pretty obvious by now that I'm partial to a bit of nail art, it's kind of my obsession.  If I had it my way I would get my nails done every week at WAH Nails and be some kind of nail-art-wielding legend.  However, a weekly trip to WAH Nails is just not possible - mostly due to the fact that it would be INSANELY expensive (if worth it) but there is no way that I could justify spending that much money on my nails on a weekly/fortnightly or even monthly basis.   

    (If you want to know how much I really love WAH Nails then check out the piece I wrote about them for LiveLikeAVIP.com by clicking here).

    Anyway, since a regular visit to WAH Nails is not an option for me, it leaves me with no choice but to wipe away those self-pitying tears and do my own nail art - which I do actually enjoy so it's not really that big of a deal (sorry, I'll admit it, I was just trying to get sympathy before!).

    In my last post 'Guardians of the Galaxy European Premiere' I forgot to mention how I styled out my nails for the film premiere (I think I was a bit overexcited about the whole situation so my nail art didn't even get a look-in and for which I can only apologise as I have not only let myself down but also all the other nail art enthusiasts around the world - forgive me? Cool. Thanks. I knew you would.). 

    The nail art that I opted for didn't really have much to do with Guardians of the Galaxy or any relevance to the Marvel franchise BUT it was bright and in your face which I felt was appropriate for cruising down a red (or blue) carpet.  I went for an eye-inspired nail design which took me about 4 hours to do - I know that some people may think that that's a crazy amount of time to spend on your nails but let's bear in mind that I was watching TV at the same time plus I find doing nail art quite therapeutic so 4 hours of it doesn't really bother me.  Wow, that was a long sentence.  Now that we've covered the fact that 4 hours is a long (but therapeutic) amount of time to spend on your nails, let's check out the finished result:

    Eye can see yoooooou!


    What do you think - eye-catching enough? (I'm really sorry, I'll quit with the eye puns!).  Drop me a comment and let me know.................or don't and just send me some good vibes - I'll take what I can get!

    Monday, 27 January 2014

    2014: The Year of the Nail Art

    New year, new nails - or at least that's the idea!  Now that it's insanely cold (I am just nowhere near ready for the snow to make it's chilly appearance) the only thing that's getting me through this frosty weather is having some fun nail art to display to the world (and by the world, I mostly just mean me and a handful of work colleagues who have to put up with me unsubtly waving my nails in front of their eyes so that they can acknowledge my handiwork). 

    My New Year's eve nails (below) are not that exciting but that's due to the fact that I left it until the last minute to do my nails so I really only have myself and lack of time keeping skills to blame, such a rookie error - I feel so ashamed!


    Freakin' loved the blue holographic nail polish though which was a sneaky purchase from Wah Nails in Topshop's flagship Oxford Circus store!

    My next nail treat for 2014 was based on my five-year-old self's role mode - Jasmine, as in Jasmine of 'Aladdin and Jasmine' fame!  All I ever wanted was a flying carpet to sing 'A Whole New World' on but I was deprived of that joy because apparently flying carpets don't actually exist or whatever!  Here's my Jasmine nails for you to have a peep at:


    My next nail art session involved smiley faced clouds with rainbows, cherries, camouflage, polka dots and a double French design. People have been loving this at work, even though I feel that my clouds look more like clowns (which is not ideal seeing as clowns terrify me!).


    I was actually lucky enough to get my nails done at Wah Nails at the beginning of December which was sort of a dream come true as I'm not going to lie  to you, it's so nice to get your nails done by someone who actually knows what they're doing!  I even went all out and got acrylics - I don't like to brag but I kind of live life on the edge!


    I just now need to figure out my next nail art designs to make sure that 2014 becomes 'The Year of the Nail Art' - because every year needs some kind of dramatic title, right?!


    Wednesday, 15 May 2013

    A Girl Can Dream.............

    So here's some of the latest nail art designs which I've been sporting lately:


    I'm kind of loving the design in the last photo, it's what I have on my nails right now and someone (yes, it was a stranger but it's ok, she didn't offer me any candy) even asked to take a photo of them which I obviously said yes to because I'm pretty nice that way (unless you eat my last Mars Bar ice cream - do that & I WILL destroy you. Seriously.). So anyway, my nails are famous now...........well, sort of.....ok, so not really but a girl can dream, right?