Showing posts with label Glitter. Show all posts

Sunday, 29 March 2015

Making Glitter Nail Polish on a Sunday Night

Sunday night blues are the worst, you know it, I know it and I'm pretty sure that that person sitting next you to on the train on your early Monday morning commute knows it.  So, seeing as I was suffering from those dreaded Sunday night blues earlier this evening (mostly due to the fact that I have to be up at 4:50am tomorrow morning for work), I decided to have some nail polish-related fun and create my own glitter nail polish. 


Back in the January sales, I purchased Ciaté's Nail Lab which was reduced from £80 to £25.  BARGAIN.  This nifty nail kit supplied me with paint pots, top coats, test tubes, a funnel, a scooper, 6 mini nail polishes, recipe cards, labels and LOTS of glitter. 


Ciaté's Nail Lab in all its glory!

Making up the nail polish was so easy and fun, I cranked up the music and felt like a mad scientist (of the nail polish-creating variety.  It's actually a very common type of mad scientist.) as I commenced upon my glitter nail varnish-making journey.  I decided that I wanted a super sparkly silver glitter with holographic confetti strands so I selected my glitters and added them to my test tube using the funnel and then gave it a good shake to mix up all the different glitters.  Once I was happy with my glitter mixture, I simply poured it via the funnel into one of the top coat nail varnishes, shook it up and it was good to go. 


If chemistry had been a bit more like this at school
then maybe I would have enjoyed it more!

I won't lie to you, by the time I was finished, it did look like there had been a fairy house party that had got out of control in my kitchen thanks to the amount of glitter that had spread all over the table and on the floor.  It's easy to clear up though with a wipe down of the table and a quick sweep of the floor so it's hardly a big deal. 


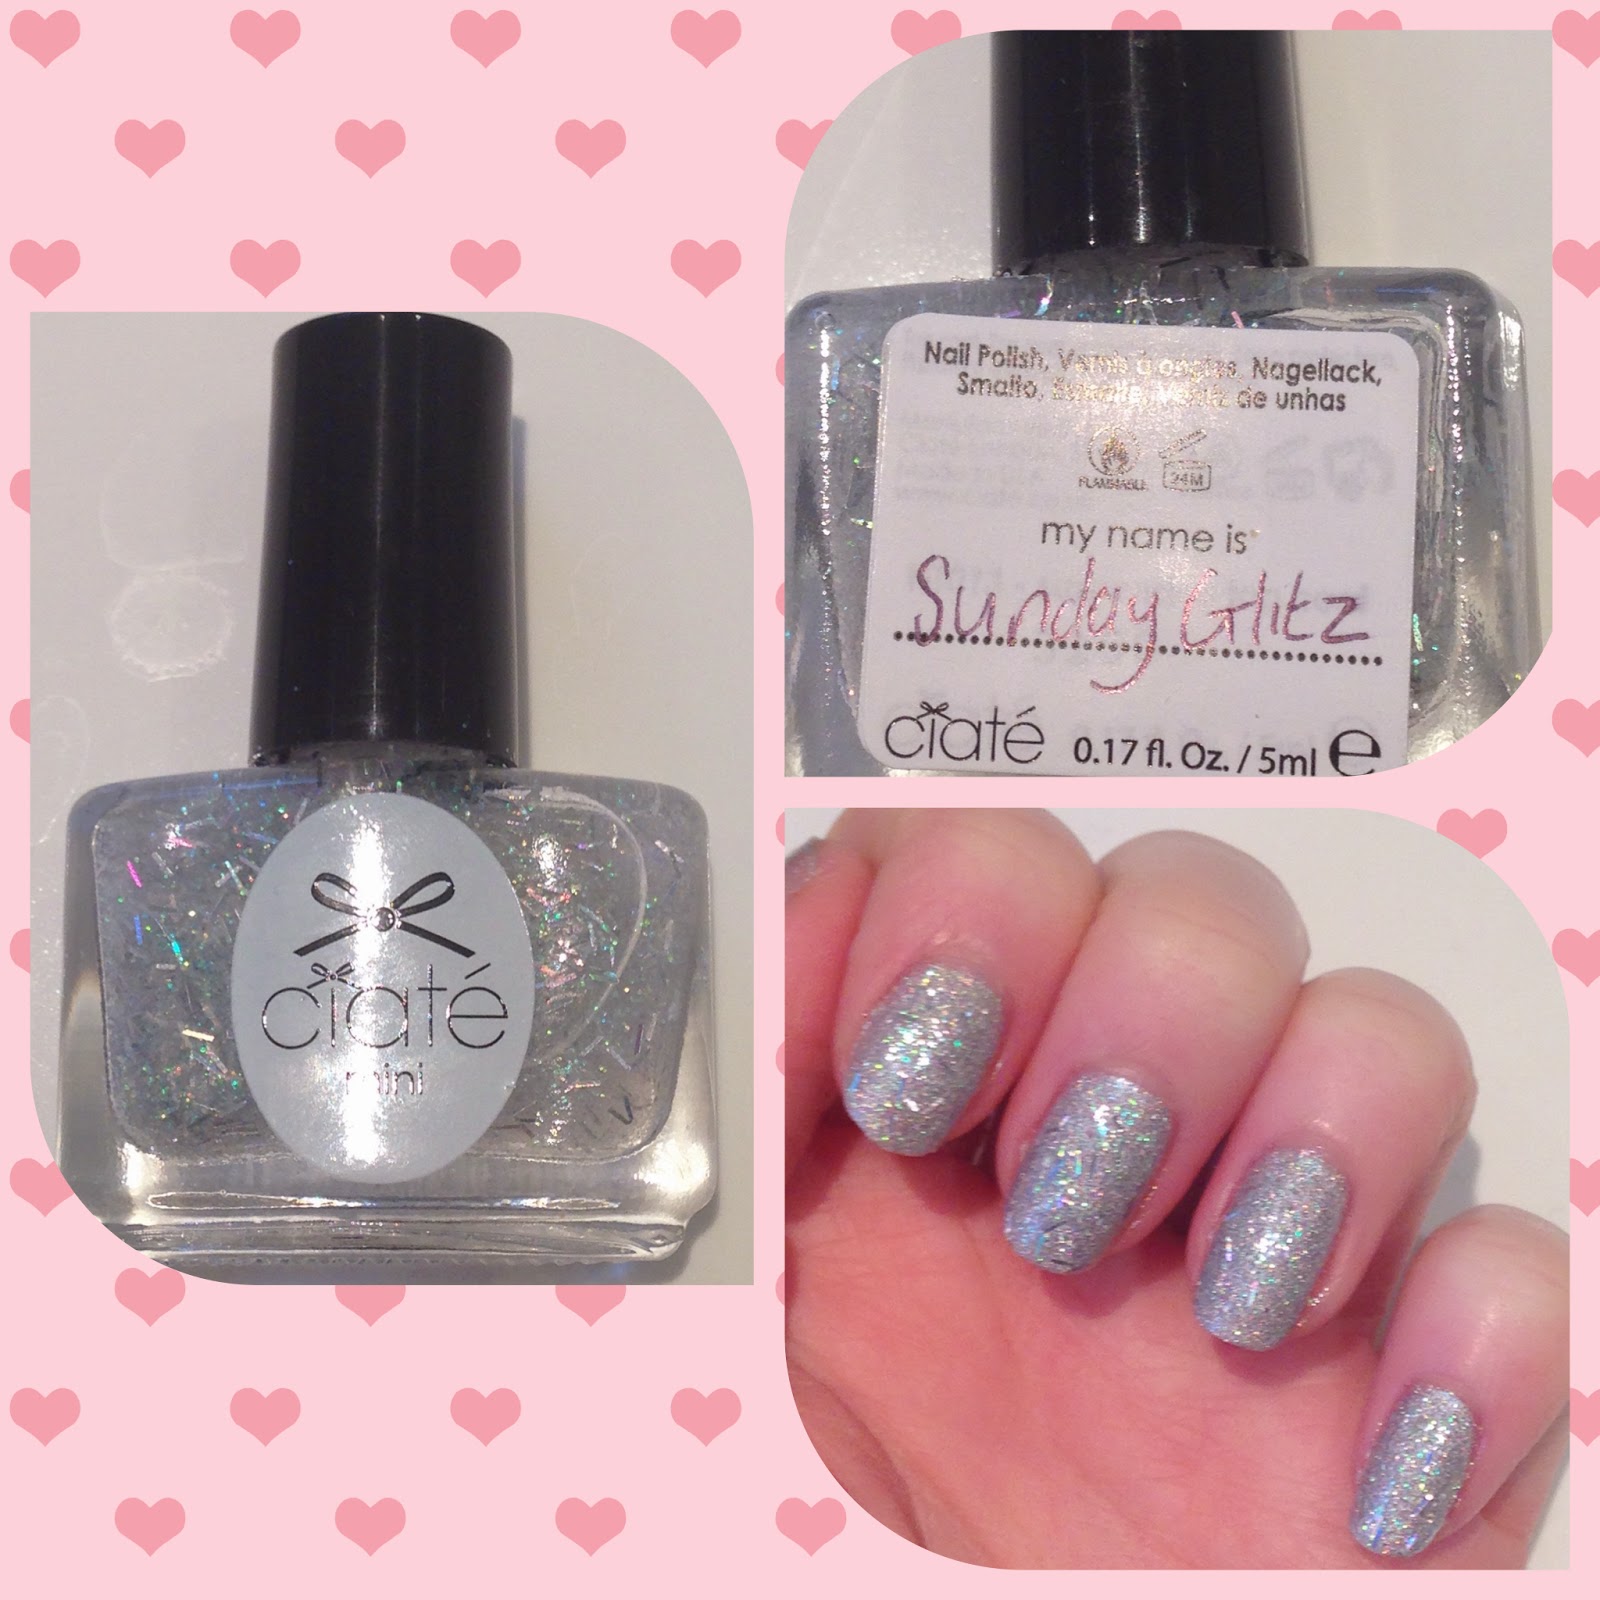
'Sunday Glitz'
One homemade glitter nail polish ready to go!

 What I love about this kit is that it includes labels for you to name and label up the nail polishes that you have created, I named mine 'Sunday Glitz' because, well, it was glitzy and it was Sunday.  I'm pretty deep.  I also used Ciaté's Paint Pot in the shade 'Looking Glass 131' as my base colour under my glitter to make my nails look even more sparkly and eye-catching.


Ciaté's Paint Pot in 'Looking Glass 131'

I have to say as great as Ciaté's Nail Lab is, I'm not sure that I would have paid top dollar for it as £80 seems quite excessive and I definitely would not have been impressed to have seen it go into the sale if I had paid so much for it in the first place.  However, £25 is a steal for such a great concept and piece of kit - not only did I feel mighty creative when making up my nail polishes but I also completely forgot that it was the end of the weekend because I was so caught up in my mad scientist ways (I genuinely should have been wearing a white lab coated, goggles and maniacally giggling away).

My finished nails with Ciaté's Paint Pot in 'Looking Glass 131' as it's base colour
paired with my homemade glitter nail polish top coat in 'Sunday Glitz'

I also purchased Ciaté's Flower Manicure kit in the same sale which I'm going to try out next weekend for Easter so I'll be sure to let you all know how I get on with that but I have a feeling that I'm going to love it just as much as their Nail Lab so you've been warned!


So proud of these beauts!

Thursday, 21 August 2014

Nail Update: Summer, glitter and sparkles!

So last week I was working the black gloopy nail art look which I absolutely loved, in fact I loved the gloopy factor so much so that this week I decided to update this nail art design and give it a more summery twist by swapping black for pink, glitter and sparkles!

Check it out my lovelies:

I can't help but smile when I look at these - is that a bit weird?
 

This design is not only cute but also pretty damn easy to do so it ticks all those pesky nail art boxes!

If you're interested (and I'm naively assuming you are seeing as you've read this far!), here's everything that I used for this look (minus the nail glue which I threw away because I used it all up):

(Top to bottom, left to right: nail diamante pin wheel (purchased from New Look but there are loads of these available on eBay), cosmetic sponge. Nail polishes (left to right): OPI Original Nail Envy Nail Strengthener, Seche Vite Dry Fast Top Coat, Maybelline Color Show Nail Polish (shade - Sugar Crystals), Models Own Nail Polish (shade - Snowflakes NP145), Bourjois So Laque! Ultra Shine Nail Polish (shade - Rosé Merveille 45), Barry M Nail Paint (shade - Matt White 66). Nail art brushes both purchased via eBay).


To create this look start off with a base coat, I used OPI's Original Nail Envy Nail Strengthener  which is my standard base coat because it keeps my nails nice and strong.  Then for all the nails except your ring fingers, apply one coat of Maybelline's Color Show Nail Polish in the shade Sugar Crystals followed by two coats of Model's Own Nail Polish in the shade Snowflakes NP145.  While your nails are drying move onto your ring fingers and apply two coats of the Bourjois So Laque! Ultra Shine Nail Polish in the shade Rosé Merveille 45 and leave to dry whilst going back to the rest of your nails you painted earlier.

Using a thin nail art brush, apply the same Bourjois nail polish used on your ring fingers along the tips of your nails creating French tips.  Once done, use an even thinner nail art brush (you'll want this for the precision of your 'gloops') and paint in your 'gloops' and connect them to the French tips you just painted on. 

Going back to your ring fingers, make sure that they are completely dry and if so, grab a cosmetic sponge and dab a little bit of Barry M's Nail Polish in the shade Matt White 66 onto the sponge and then blot it onto some kitchen roll, tissue or tin foil and carefully dab it onto the tips of your nails working down to create a subtle ombre/dip dye effect.  Once your happy with your ombre effect, then apply Seche Vite's Dry Fast Top Coat to blend the white and pink nail polish together even more so.  Then apply the same top coat to the rest of your nails.

To finish off, grab a selection of diamantes for your two ring fingers and using some nail glue apply the diamantes to your ring finger nails.  Finish off with a final application of your top coat and you're all done! 

I hope my explanation made sense, I'm one of those people that has a tendency to waffle on a bit so it can be a real mission for me to explain something relatively simple without making it sound incredibly complicated and daunting.

Well, there you have it, a simple guide to some super summery and sparkly nail art - let me know what you think!

I could stare at these all day!

Monday, 11 August 2014

Eye-Catching Nail Art

It's pretty obvious by now that I'm partial to a bit of nail art, it's kind of my obsession.  If I had it my way I would get my nails done every week at WAH Nails and be some kind of nail-art-wielding legend.  However, a weekly trip to WAH Nails is just not possible - mostly due to the fact that it would be INSANELY expensive (if worth it) but there is no way that I could justify spending that much money on my nails on a weekly/fortnightly or even monthly basis.   

(If you want to know how much I really love WAH Nails then check out the piece I wrote about them for LiveLikeAVIP.com by clicking here).

Anyway, since a regular visit to WAH Nails is not an option for me, it leaves me with no choice but to wipe away those self-pitying tears and do my own nail art - which I do actually enjoy so it's not really that big of a deal (sorry, I'll admit it, I was just trying to get sympathy before!).

In my last post 'Guardians of the Galaxy European Premiere' I forgot to mention how I styled out my nails for the film premiere (I think I was a bit overexcited about the whole situation so my nail art didn't even get a look-in and for which I can only apologise as I have not only let myself down but also all the other nail art enthusiasts around the world - forgive me? Cool. Thanks. I knew you would.). 

The nail art that I opted for didn't really have much to do with Guardians of the Galaxy or any relevance to the Marvel franchise BUT it was bright and in your face which I felt was appropriate for cruising down a red (or blue) carpet.  I went for an eye-inspired nail design which took me about 4 hours to do - I know that some people may think that that's a crazy amount of time to spend on your nails but let's bear in mind that I was watching TV at the same time plus I find doing nail art quite therapeutic so 4 hours of it doesn't really bother me.  Wow, that was a long sentence.  Now that we've covered the fact that 4 hours is a long (but therapeutic) amount of time to spend on your nails, let's check out the finished result:

Eye can see yoooooou!


What do you think - eye-catching enough? (I'm really sorry, I'll quit with the eye puns!).  Drop me a comment and let me know.................or don't and just send me some good vibes - I'll take what I can get!

Sunday, 25 March 2012

Uh Oh! I Did My Nails Again!

Um.....so......I painted my nails again last night BUT it was only because I wanted to try out this nail glitter by GOSH Cosmetics which I bought yesterday. So there I was just casually hanging out in Superdrug, as you do, having a browse of the make up and what not when my eyes latched onto this new GOSH product. It's basically a tiny pot with loose glitter in & all you have to do is paint a clear coat of polish on your nail & while it's still wet you put it in the glitter pot so that the glitter sticks to it & then brush off any excess.

This, I figured, seemed simple enough and I love glitter so I was pretty much down with that. However, even though it's fairly simple, I don't know if I could be bothered to do it on all my nails because it is a bit of a hassle. I found that my nail was a bit too long, so I couldn't position it properly in the glitter for it to cover the whole nail so I was having to flick it about & basically it got a bit messy/fiddly. The glitter does tend to go everywhere so you do need to make sure you do it over some paper or kitchen roll or something. The effect does look great though and just one nail I can probably cope with but doing all my nails would probably have destroyed me a little bit because I can totally see myself getting all in a glittery mess with it.

Here's how it looks though (apologies for camera quality again):
The glitter effect is on my ring finger, just, you know, FYI & all that.
 I couldn't be bothered to do the glitter on my other hand (look, I'm lazy, ok?!), so instead I did a stripey patterned design on my ring finger because I'm sad AWESOME. So here you go:


I wonder how long I last before I feel the need to paint my nails again? I give it 48 hours!